
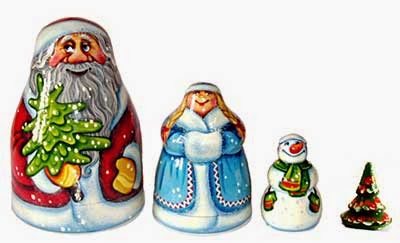
Matryoshka always help if there is no suitable gift and once to look for him, it is a good decoration in your home and, finally, the process of painting a lot of fun master. You can not just paint the dolls, but also decorative plates, boxes, and generally any "piece of wood" that is at hand. Techniques, which we describe are applicable to any product made of wood, are simple in design and are available for beginners. Learning to draw is never too late. Moreover, all the materials that will be needed for this, not expensive and are sold in almost any art salon, office supply store.
The painting can be not only your passion, it is easy to attach and children, thus developing in them a love for creativity, imagination and, at the same time, patience and hard work. With six sons, in my experience, the curiosity and the desire to somehow participate in the "unusual" (as opposed to washing and dishwashing) mother's occupation cause baby dolls, which in his eyes turn from "naked" pieces of wood in the fairy princesses. Help a child or even just watching your work you will unite together and provide an opportunity to experience the joy of creativity.
So, for the cause! Together, let us draw!
Materials you will need:
blank wooden nesting dolls or the thing that you are going to paint;
gouache and watercolor;
brush squirrel №№ 1,2,3,4;
watercolor "bronze" (though, to have this paint is not necessarily);
sandpaper 0 and 1;
simple pencil (preferably soft) and eraser;
nitrocellulose lacquer NC;
pentoftalevy varnish (oil) PF;
turpentine (acetone).
Billets
Once stocked with everything you need, before you will be a question: where to get the blank? I can suggest two options:
if you are just starting to draw, of course, it is better to use something that is cheaper and not difficult to get. Well, for example, a cross-section of dry wood. Or any more or less smooth slate correct form, of those that are always after the joinery.
If you are confident in their abilities and are not afraid to take on matryoshka, preparation for it is better to buy in the store. When to buy the blank is not possible, try to carve it on a lathe. I heard that for the master, such work is not particularly difficult. But keep in mind that the workpiece to be done from the dry linden. Workpiece same kitchen for cutting bread plates can generally be found in the most unexpected places: in art galleries, and in hardware stores, and most do not very difficult.
Now that you've stocked the source material, begin to process it.
Surface preparation
Carefully inspect the surface of the product: it should not be knots, cracks, roughness. Even if the surface is smooth, just in case walk on it with sandpaper number O (nulevkoy). By the way, it is important that the wood is completely dry, otherwise the product is deformed, paint flake off, cracked and ... everything!
Facial contour
So, we clean the workpiece. And the first line, which should take place at a future dolls, will be a vertical line from the top to the bottom. Then on the line on the head matryoshka outline point - the center of the face. Line oval face, or rather a circle, the easiest way to hold the compass.
To verify the location of a person, look matryoshka "straight in the eye": if the contour of the face is above the "neck" - the restriction on the workpiece, and the top and sides of the face there is a place for the future of the handkerchief, then everything is fine.

Shawl
The upper edge attached handkerchief as it coincides with the contour of the face. The lower edge of the shawl neck closes in the front (Fig. 1a), almost all of the back (Fig. 1.6), and the side line of the lower edge of the handkerchief held approximately diagonally (Fig. 1c).
Sleeve

The contour of the sleeve is also conveniently applied using a compass. In this part of the circle is placed on the "territory" of a tissue, as shown in Fig. 2a. If the hand is folded down, the cuffs and palms are drawn from the bottom, if the arm is bent at the elbow - side in Figure 2 as well. If the hand is folded down, the cuffs and palms are drawn from the bottom, if the arm is bent at the elbow - a side line radius circle sleeves (Fig. 2b, c).
To outline clothes, put on her background in gouache, which paint a slightly diluted with water to the consistency of sour cream. The choice of colors depends on your imagination, taste and color availability. For example, take a blue sundress and a light blue handkerchief or red sundress and black scarf.
Note that the first paint is applied over light colors, then darker, black paint is applied to the latter. So, first paint the white sleeves, blue handkerchief and then, finally, blue sundress.
Now that matryoshka "dressed", let it dry properly (at least 1 hour), and only then proceed to a more detailed painting.
Hairstyle

Traditional hair matryoshka - "parted in the middle." Hair paint yellow paint to outline the contour of a pencil. After the paint dries, select the individual strands ocher, as shown in Fig. 3a. If you can, then brush number 0 or number 1, beat matryoshka "curls" (Fig. 3b).
Impressive look "red matryoshka", especially nakinuvshie black or white handkerchief. In this case the strands better highlight any dye brown and do without curls. Hair matryoshka effectively decorate "pearls", placing it in 3 rows (Fig. 3c).
If you like the brown-haired brunette or burning, the strands of hair to highlight the lighter paint the same color. But be careful, dark-haired matryoshka sometimes is too dark and then she "pearl" nachelnik a must.
Ornament on the sleeves

On a white background sleeves look good wide variety of patterns. And their complexity depends on what your skill in drawing. Fig. 4 shows several different options complexity of the pattern. Surely imagination tells you, and any other pictures, more original and "easy to implement. The lines ornament to perform better in blue or black ink brush № 1. By the way, do not necessarily draw a white sleeve, it can be any color (according to suit your nesting dolls).
Painting shawl

Fig. 5 is a fairly simple composition painted scarf. Good for her and blue background (flowers done in blue and white) and black background (flowers in red and white colors). Leaves and in fact, and in either case are either green gouache or watercolor "bronze."
To "tasteful" place flowers and leaves on a scarf, first outline the contours of a pencil, think carefully about the location of each of the elements of the picture.And only after that proceed to stepwise painting, as shown in Fig.6.
First paint the buds and petals of flowers paint the base color (red). Once the paint is dry, white paint outline the contours of the petals, and then outline the bud. Black paint distinguish middle bud and flower white finish "beads."
Now it was the turn of the petals.The easiest option petals - shamrock (Fig.7). First green paint completely paint the petals, and when the paint is dry, select the middle of a black color of each petal and then wait for the paint dries. After that, put a big point at the base of the petal: so it looks more complete. Fig. 7 g presented a more complex piece of paper. It is better to perform "bronzyankoy" and select the middle with black paint. Now look closely at the arrangement of flowers and leaves on a scarf. Sure, some places were not filled with anything from space "bare background." But do not worry, this flaw is easily corrected by using all sorts of twigs Christmas trees, shown, for example, in Fig. 7, d. Well handkerchief and acquired presentation!
To paint does not get dirty when it comes to paint the front of the queue dolls, better put on his left hand an old glove, or better yet a scarf to cover varnish NC. But lacquer work should be very carefully, carefully adhering to the contours of a handkerchief. And if you have used in red paint, then beware doubly under the nail, it will flow and everything will be rosy white. To avoid this, apply the varnish with a cotton swab wrapped in gauze, gently dabbing his face.
Nitrocellulose lacquer dries quickly, and within 10 minutes you can continue.
Painting sundress

To fill the foreground, the easiest way to draw in the hands of nesting dolls bouquet of flowers, with enough 3 flowers similar to those which had been decorated with a handkerchief. Look good and 3 identical flower or flower bud and 2. Approximate location and components "bouquet" are shown in Fig. 8. If you have chosen for your Matryoshka blue sundress, then try to draw in her hands a bouquet of daisies. On a blue or black background, they look particularly impressive.
To do this, put some distance from each other 3 ... 5 ovals (Figure 9). Then each of them write one more oval smaller (Fig. 10a) and gently apply white paint petals. When the latter dried up, fill in the middle of a yellow flower (Fig. 10, c). To give daisy volume, hold the bottom edge serdtsevinki ocher stripes (Fig. 10, d). After that outline the lower edge of the thin line of brown paint (brush number 1) and plot points stamens. (Fig. 10 d). Chamomile is ready! The remaining space on the sundress fill leaves and buds, and leaves no longer need to write so carefully enough to identify them easy strokes. To revive the bouquet, well over the green leaves to draw exactly the same yellow. When the "bouquet" dries, sundress, like a handkerchief, NC varnish.
Face

To correctly position the elements of the face, carefully plot the pencil on the abandoned face round 2 horizontal lines (Fig. 11, a). The upper part of the circle will take the hair will be located in the middle of the eye, and at the bottom - lips and blush.
Eyes
At equal distances from the center apply 2 points. Around them, a thin dotted line draw a circle - his eyes. Then eye inscribe a circle smaller circumferential diameter - pupils (Fig. 11 b, c). Draw lines century as shown in Fig. 11 of these 2 lines that go from one point, gradually diverge, skirting the eyes are moving in parallel lines. Thin eyebrows as if repeating lines century. All lines with a soft pencil, barely touching the surface.
Now undertake the gouache and paint a larger radius circles blue (green) paint, and small black circles. Then outline the eyelid white paint or ocher (you can not do) and a fine brush number 0 or 1 line accurately outline the century with black paint. Immediately draw cilia. To do this, gently holding the brush but the extension century in the right place to change direction quickly and remove the brush, "crooking" cilium up. Once the black paint is completely dry, put on pupils with white paint small dots or streaks in the form of a comma, giving eyes "shine."
All these operations are quite difficult and require drawing a considerable effort, especially from novice. Therefore, I advise before paint matryoshka person to practice on paper and "stuff" hand.
Nose
Denote the spout 2 points, placing them symmetrically at a distance of about 1/3 of the lower contour of the face. Here is our matryoshka and began to nose.
Lips

First draw the contour of the lips - this is the most important thing. Divide the distance from the nose to the lower contour of the face in half. At this level, draw a horizontal line (Fig. 12 a, b), then "bow" (Fig. 12 c) and a lower lip contour (Fig. 12d). Paint the lips red. If the tip of the brush lightly lift up the corners of the lips, matryoshka you "smile." Fig. 12 shows the options for lip shape.
Blush usually using matches and wool make watercolor or blush of beauty set. "Lights", he at the same level with the line of the lips.
Once the paint is completely dry, cover the face NC lacquer with a cotton swab.
Brush the bottom of a matryoshka each the same paint as the sundress, and also cover the varnish NC.
If you accidentally smeared the paint, do not despair when it is dry, you can scrape it with a razor blade or sandpaper to clean up.
Final painting
Prepare a place to work: some plate, covered with a cloth. Pour the varnish PF of banks into smaller packages. Oil varnish suitable bristle brush. Discover all the nesting dolls. Carefully apply a thin layer of lacquer most. Brush movement should be slow to varnish is not a bubble. Watch carefully so that no streaks. Varnish dries at least one day in a dry room (at room temperature). When the 1st layer is completely dry (there should be a sense of "stickiness"), matryoshka cover the 2nd layer of varnish. If on the varnished surface bubbles were found, remove them with a fine sandpaper. Do not be fooled that the matt after varnishing it will regain clarity.
You certainly get your hands dirty, but there acetone (turpentine), which removes bad oil varnish. By the way, in a jar with turpentine after work well to lower the brush.